Getting started
Simulink
The Franka MATLAB Toolbox includes a comprehensive set of Simulink and MATLAB examples. These examples are designed to help you understand the toolbox’s capabilities and can be customized to meet your project requirements.
To browse the available examples, use the following command:
franka_toolbox_examples();
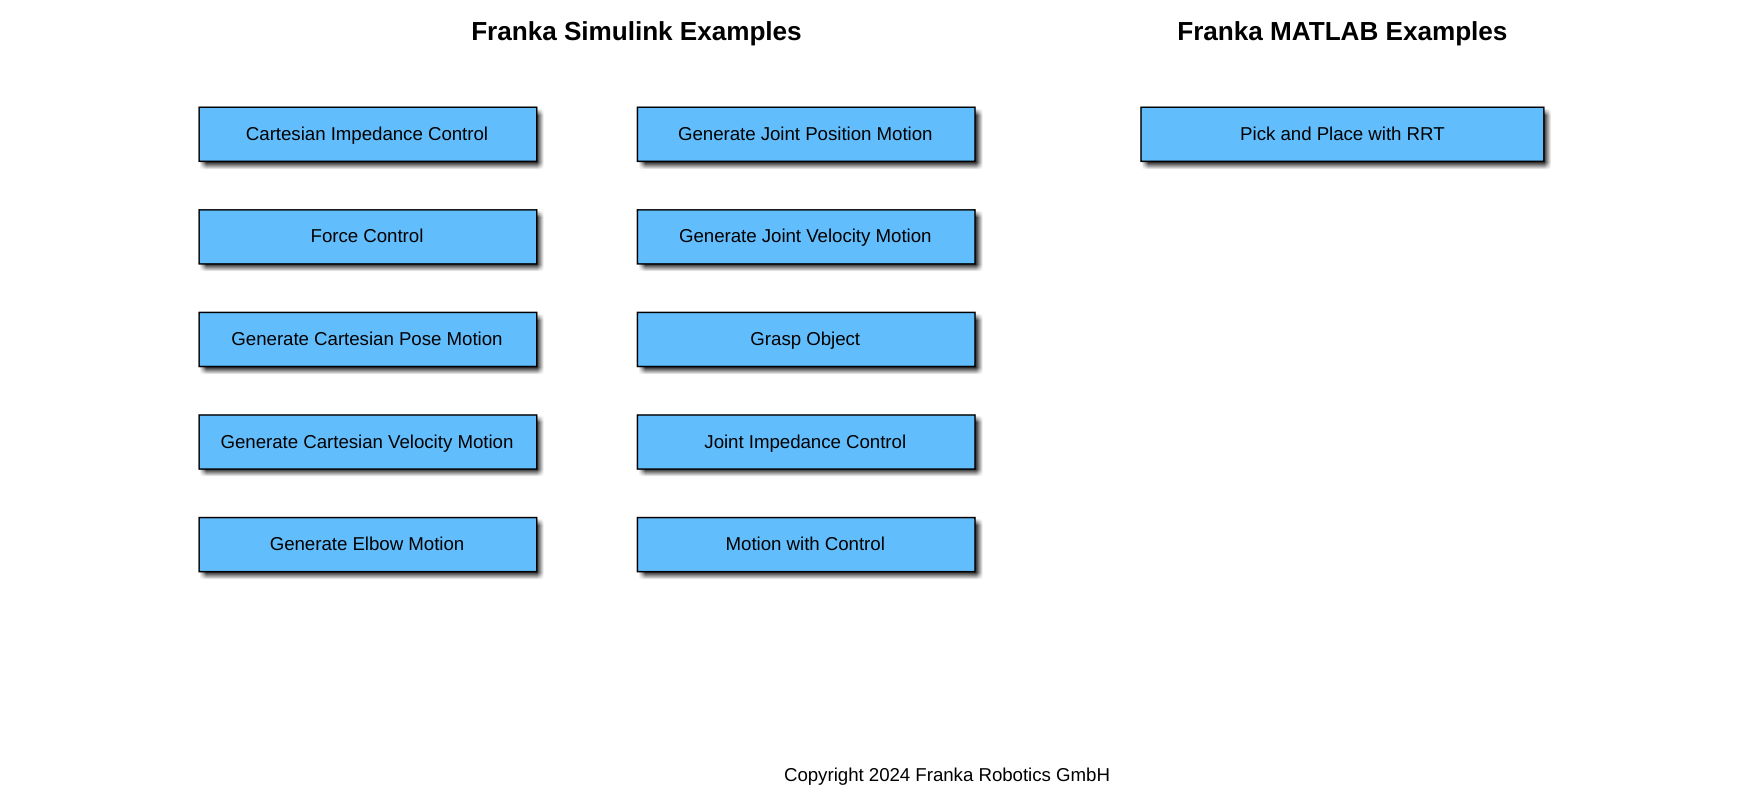
Franka MATLAB Toolbox Examples Navigator.
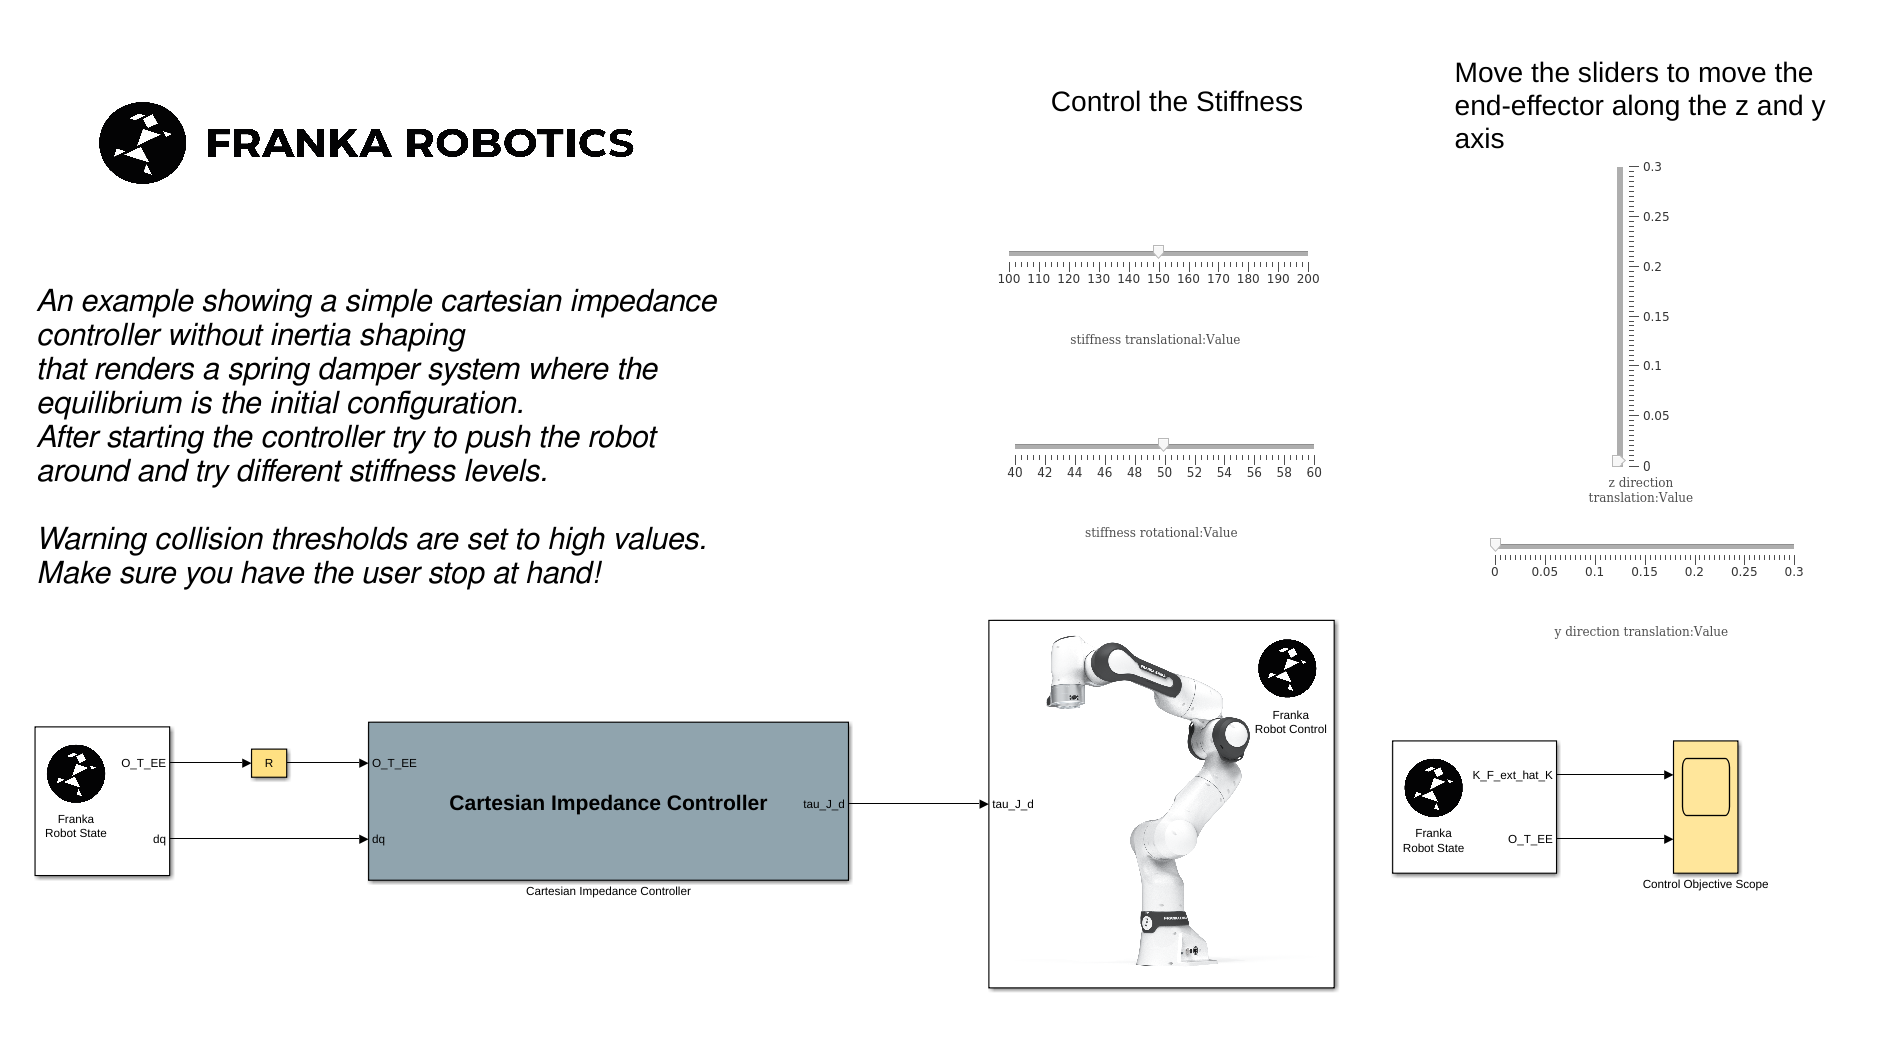
The Cartesian Impedance Control Example equiped with sliders as UI elements for controlling the End-Effector position.
After opening, by double clicking, any of the Simulink models the robot settings will be loaded automatically in the workspace, in the form of the frs object.
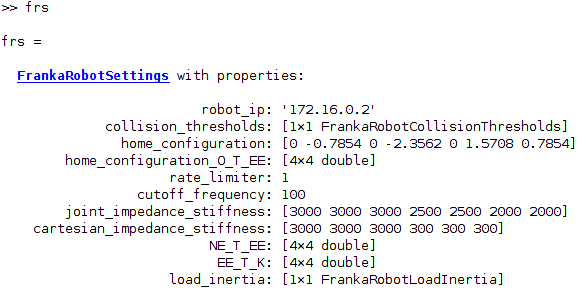
The Franka Robot Settings object.
The robot_ip is set to 172.16.0.2. Make sure that the robot_ip, as well as all the other parameters matches your setup for your intended purposes.
frs.robot_ip = <your robot ip string>
You can modify the default settings for the FrankaRobotSettings with
edit FrankaRobotSettings.m
Simulink Solver Settings
The requirements for the solver settings for the Simulink model should be:
Fixed-step
discrete (no continuous states)
With Fixed-step sixe (fundamental sample time) of 0.001.
Simulink Build & Deploy - Target PC: Franka AI Companion
For building & deploying to the Franka AI Companion you can use the following recommended workflow:
Start by clicking “Run on Hardware Board” in the Simulink APPS pane and select the “NVIDIA Jetson” option.
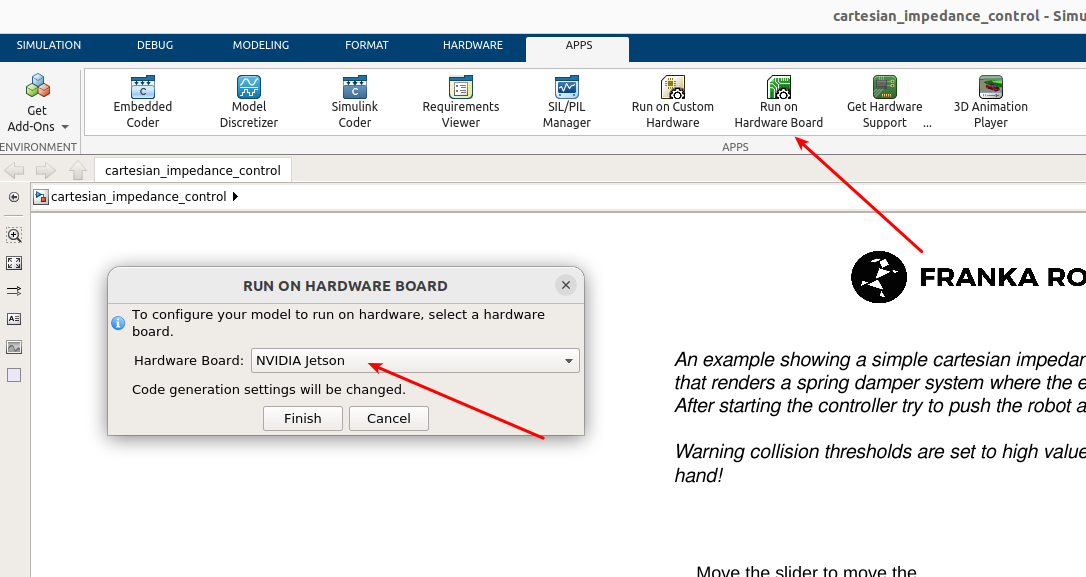
Run on Hardware Board - Select “NVIDIA Jetson”.
Important
In case this option is not visible make sure that the MATLAB Coder Support Package for NVIDIA Jetson and NVIDIA DRIVE Platforms is installed.
We need to proceed with a couple of “Hardware Settings” before building & running the model.
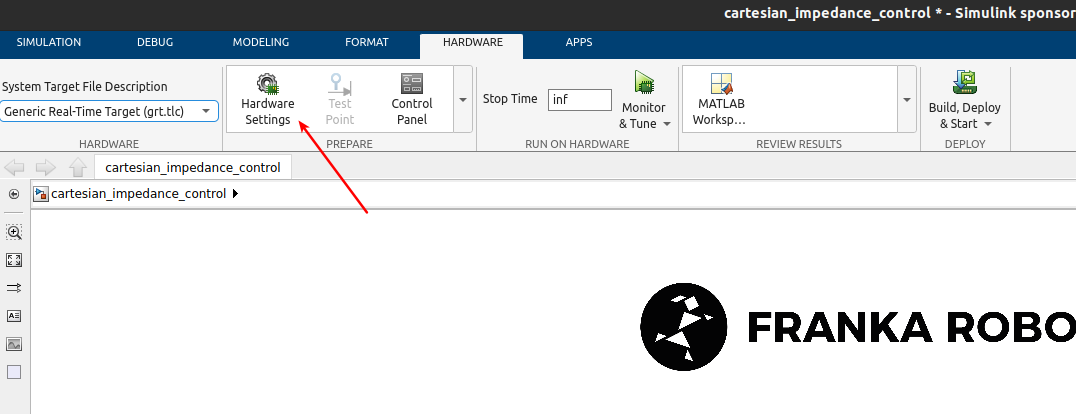
Select the “Hardware Settings”
Select the “NVIDIA Jetson” Hardware board
Set the Device Address, Username and Password which correspond to your docker instance as it is running in the Franka AI Companion.

“Board Parameters”
It is recommended to select the “C++11” option in order to ensure compatibility with the MATLAB Coder Support Package for NVIDIA Jetson and NVIDIA DRIVE Platforms.
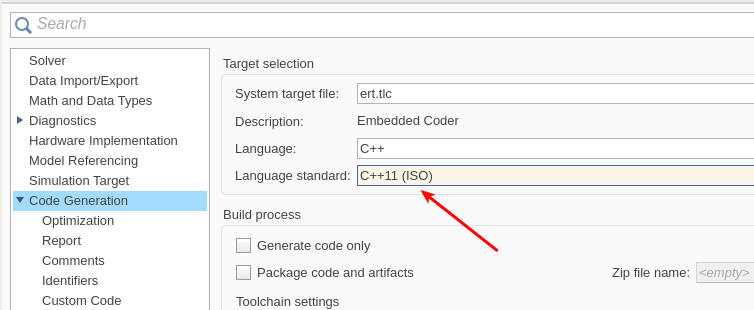
Select the “C++11” option.
Important
For setting the specific port in which the ssh server is exposed by the currently targeted docker instance, please excecute the following MATLAB command:
franka_ai_companion_port_switch(<desired port number>);
Important
If you are planning to utilize the External Mode for “Monitoring & Tuning” make sure that you’ve applied the settings descibed in the section bellow Simulink External Mode (“Monitor & Tune”) - Necessary Settings.
Important
Before executing make sure that the brakes of the robot are disengaged, the FCI mode is activated in Desk and that the robot is in execution mode (user-button is released)!
You can now “Build and Deploy” or “Monitor and Tune” for running the Simulink Model!
Caution
The robot will move! Make sure that you are monitoring the situation, ready to take action if necessary!
“Build & Deploy” or “Monitor & Tune” for enabling the External Mode.
Simulink Build & Deploy - Target PC: Linux Host
Important
If you are planning to build, run & deploy the application to your linux host pc make sure that you’ve installed libfranka and a Real-Time kernel as described in the previous installation page.
Let’s start by selecting the Run on Custom Hardware App from the Apps pane in Simulink. Allow the grt.tlc target to be auto-selected, as prompted.
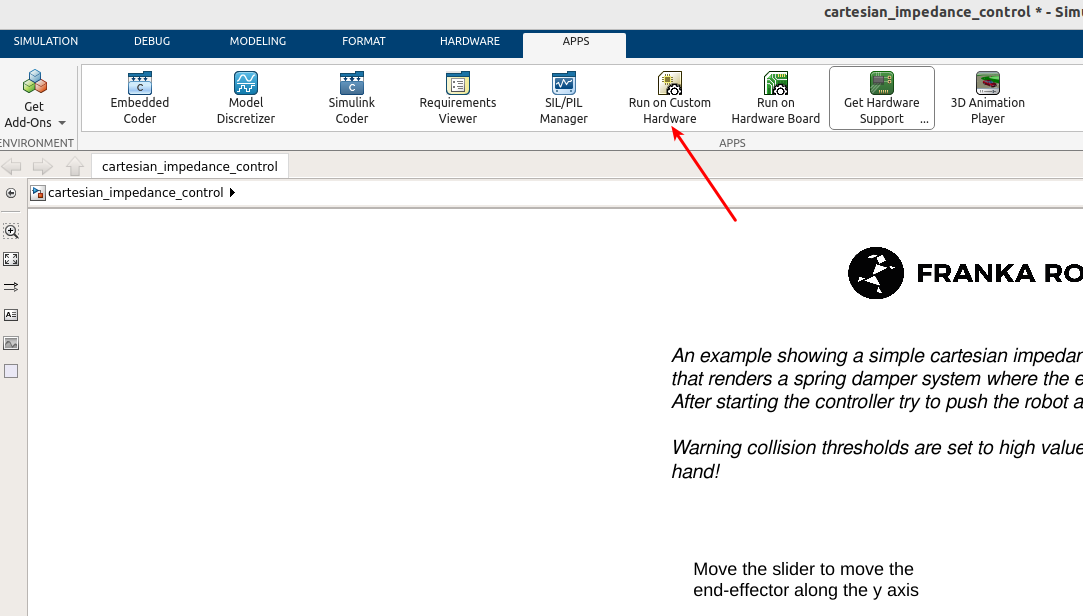
“Run on custom hardware” Simulink App.
Please proceed with the following necessary model checks before proceeding:
The Device vendor under “Hardware Implementation” is either “Intel” or “AMD” and device type “x86-64 (Linux 64)”.
Code interface packaging options is set to “Nonreusable function”.
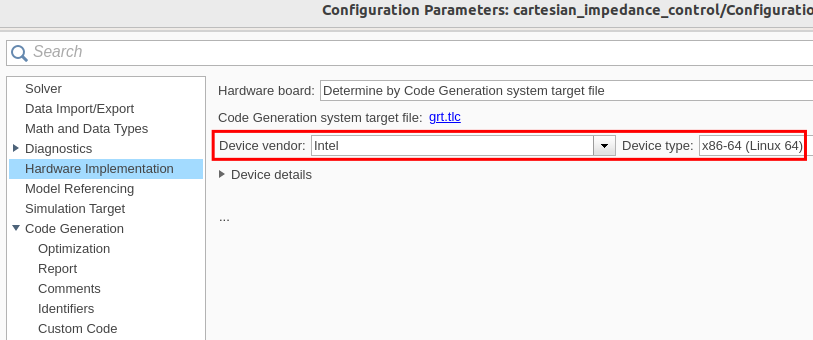
Hardware Implementation - Device vendor selection.
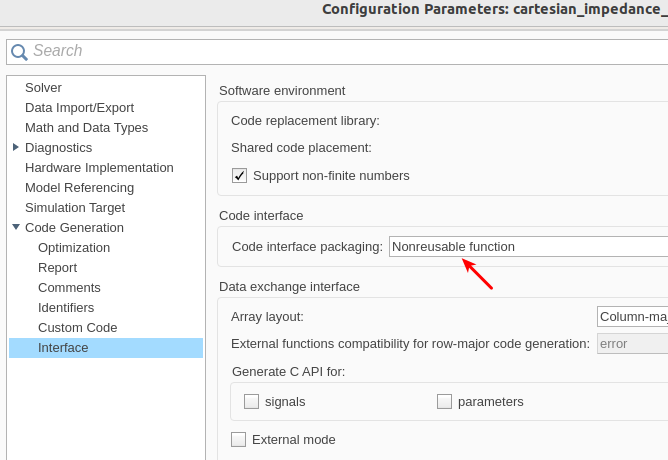
“Code interface packaging” options.
Important
If you are planning to utilize the External Mode for “Monitoring & Tuning” make sure that you’ve applied the settings descibed in the section bellow Simulink External Mode (“Monitor & Tune”) - Necessary Settings.
Important
Before executing make sure that the brakes of the robot are disengaged, the FCI mode is activated in Desk and that the robot is in execution mode (user-button is released)!
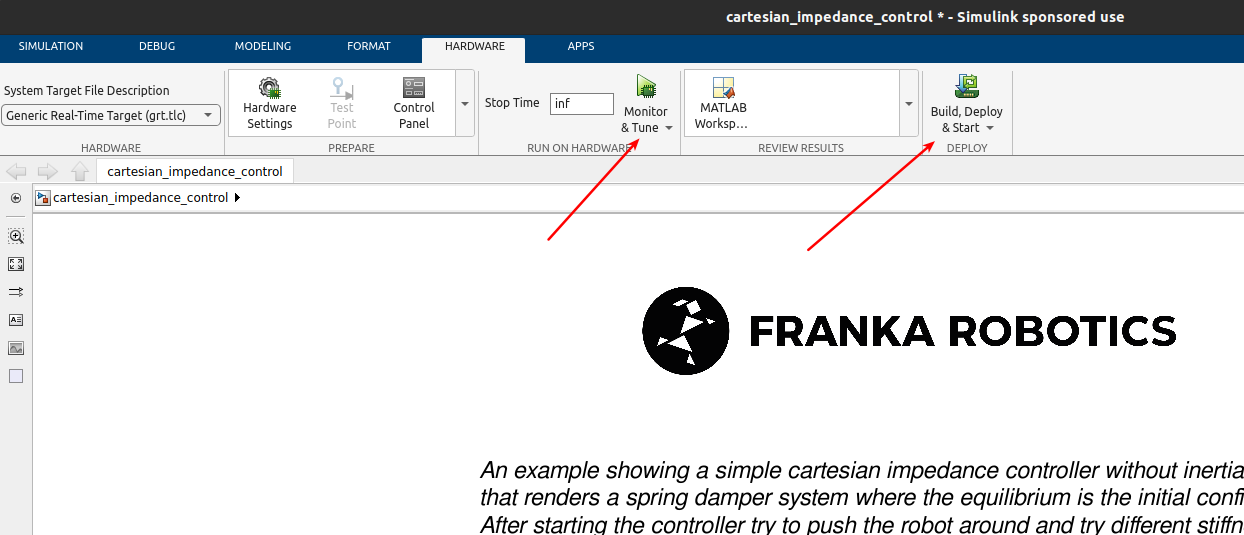
You can then select from the Hardware tab either Monitor & Tune in case monitoring through the external mode is desired or Build, Deploy & Start for just executing the application without monitoring.
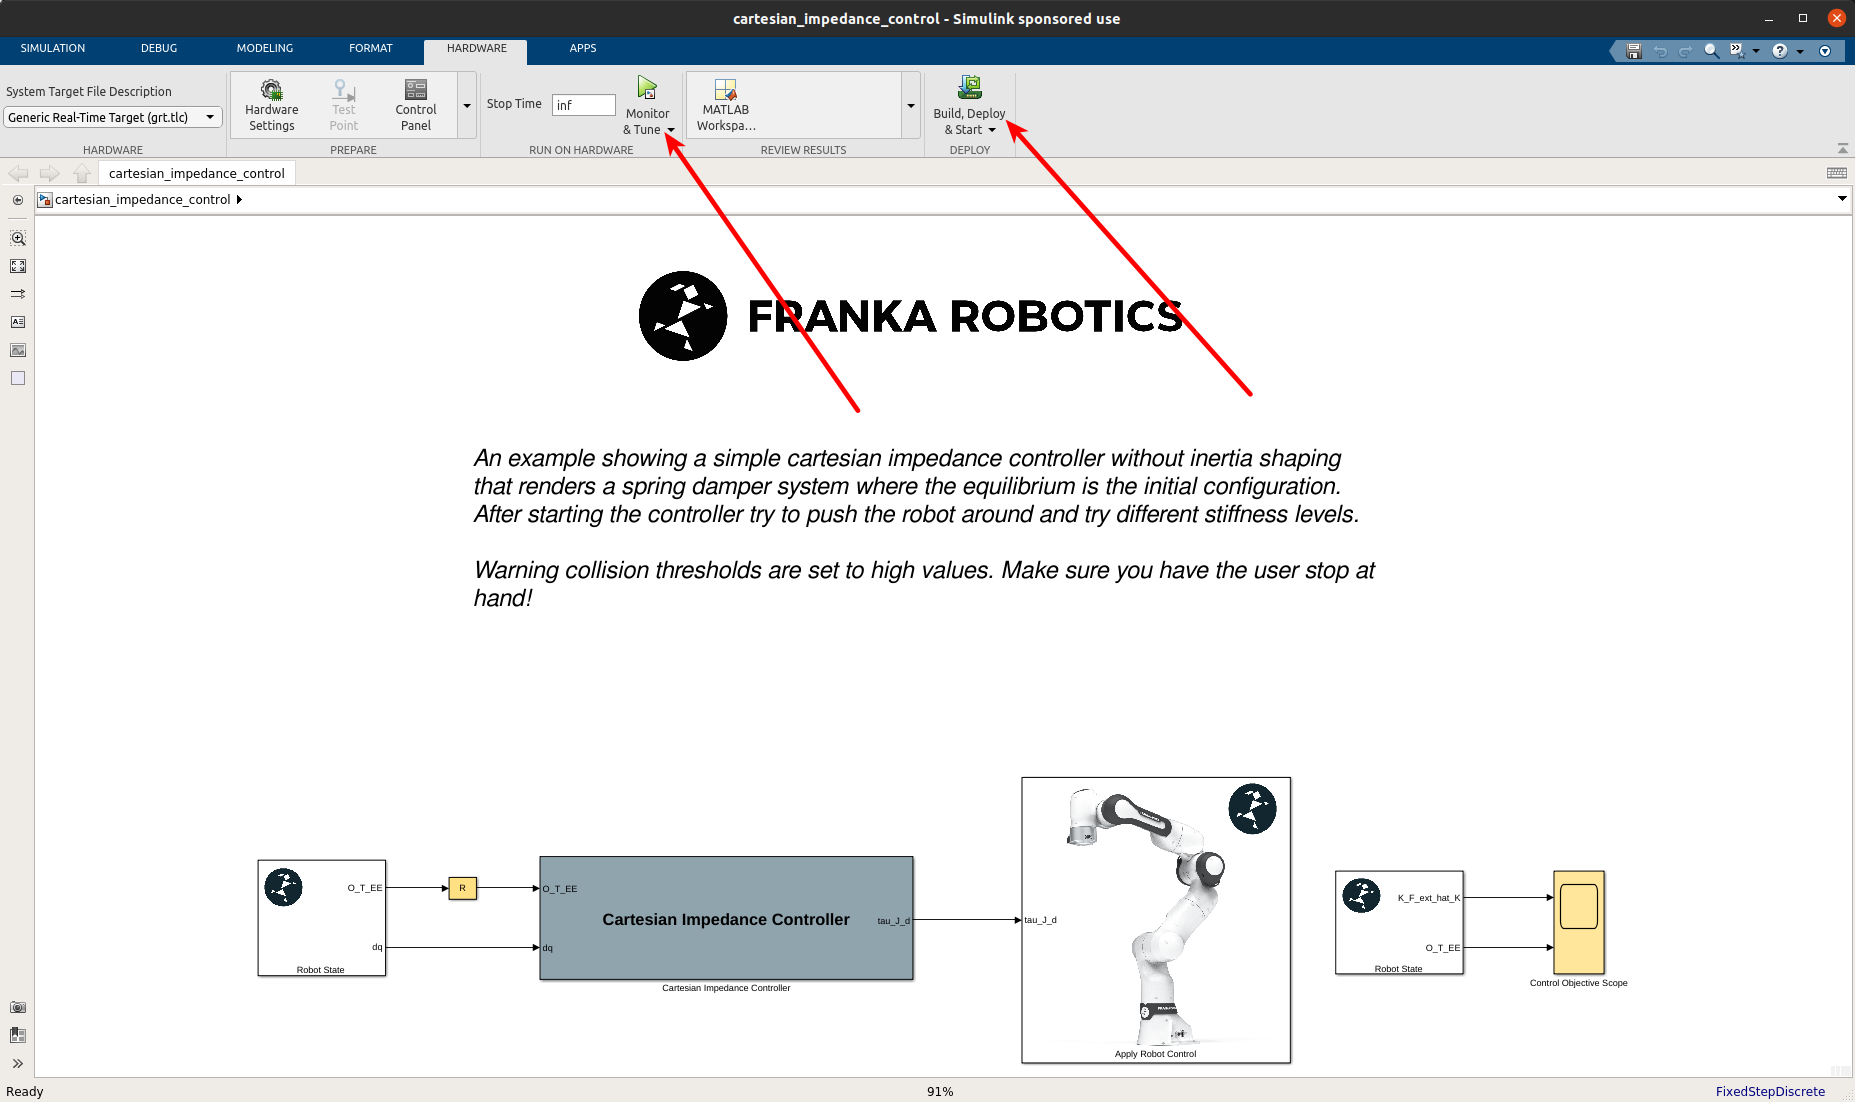
Hardware Simulink App.
Caution
The robot will move! Make sure that you are monitoring the situation, ready to take action if necessary!
Simulink External Mode (“Monitor & Tune”) - Necessary Settings
In case you are planning to execute with External Mode for “Monitor & Tuning”, it is also necessary to apply the following settings:
“Run external mode in a background thread”.
The Code interface packaging is “Nonreusable function”.
“MAT-file logging” is unchecked.
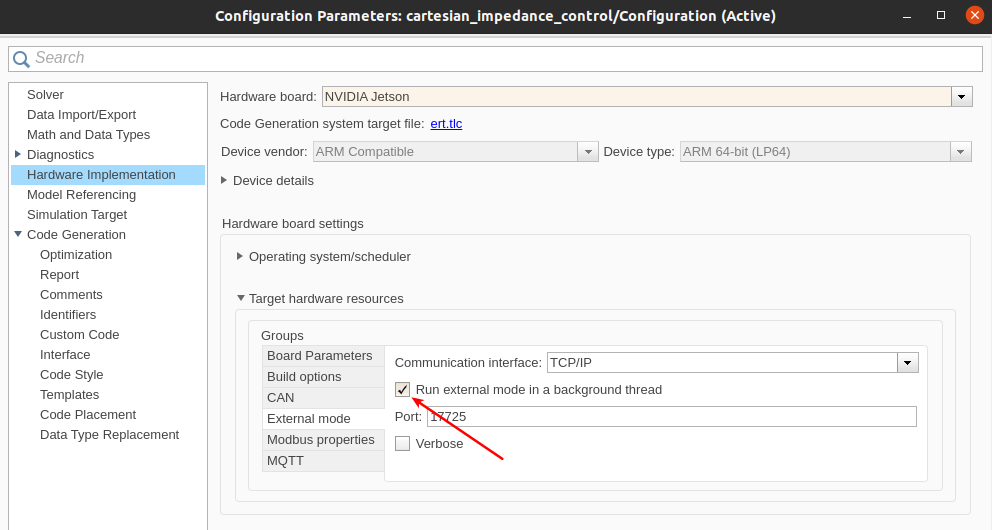
“Run external mode in a background thread” is necessary so that the 1kHz loop won’t get disturbed
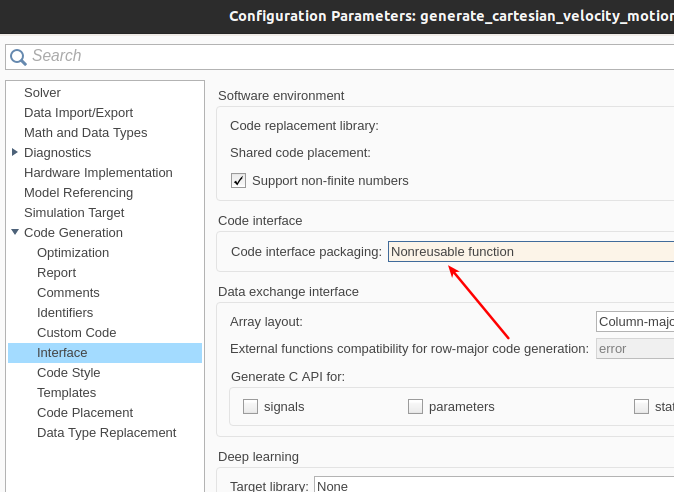
“Nonreusable function option is required for building with External-Mode
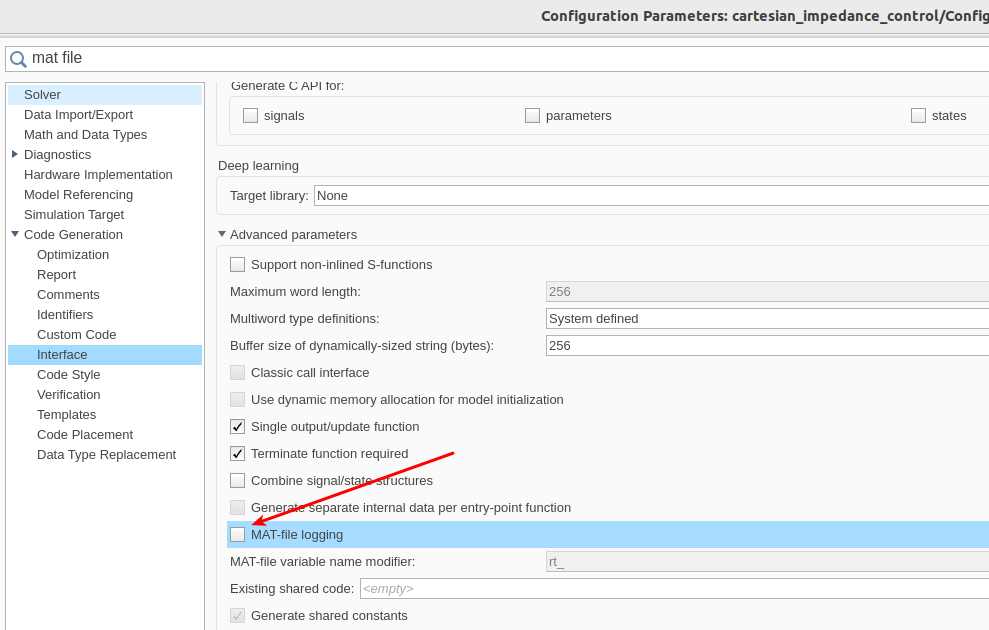
“MAT-file logging” should be unchecked unchecked for building with External-Mode”
MATLAB
Demo Pick & Place with RRT
For familiarization with the Matlab API for the Franka Robot the pick_and_place_with_RRT.mlx demo is a good starting point.
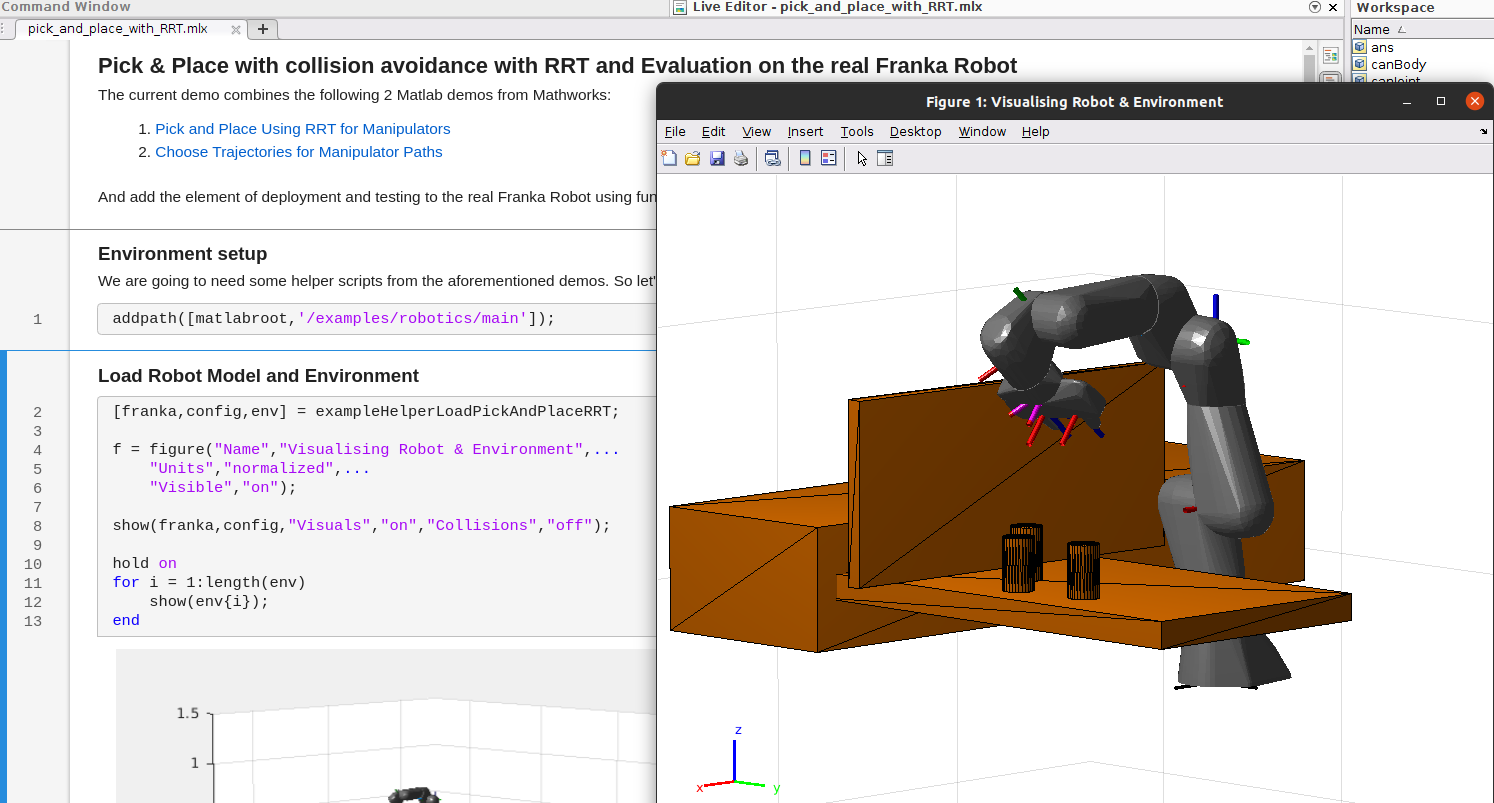
Live Matlab Script and Figure of the pick^and^place demo.
Automatic error recovery
If the robot encounters an error state and transitions to reflex mode, you may attempt a recovery by executing the automatic error recovery command in Matlab.
fr = FrankaRobot(<robot ip as string>);
fr.automatic_error_recovery();
In case the command fails and the robot remains in the erroneous state try using the guiding mode to manually bring back the robot to a valid configuration.
Hint
Checkout the Franka library for MATLAB for a set of helper functions that can help to optimize your workflow.